Negative Rag Painting:
How-to Tutorials
Negative rag painting (also known as ragging off, cloth distressing and cheeseclothing) is one of the most popular decorative techniques - it's quick and easy to execute, and produces a smooth texture that looks more sophisticated than sponging.
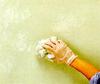
This method of rag painting is called "negative" or "subtractive" because here you use some type of cloth to lift off (remove, rather than add) some of the wet glaze, revealing the base color underneath.
Like its companion decorative painting technique of ragging on, ragging off gives you significant opportunity to experiment and customize the texture and consistency of the glaze that appears on the wall.

Sometimes a newspaper is used to blend the colors before the cloth is worked over the surface.
Plastic bags, burlap, chamois and canvas can also be used as "rags" (anything that doesn't give off lint, which could come off on your surface) in addition to, or instead of regular cloth, to create a variety of unique effects.
And just like in positive ragging, the way you hold the rag, the pressure applied when working it over the glaze, as well as the color combination, glossiness and translucence of the glaze all affect the look of your final subtractive rag painted finish.
Secrets to Beautiful
Ragged Off Finishes
Although often considered a delicate finish, negative rag painting can actually help hide some surface imperfections and camouflage uneven, bumpy areas on old walls.
But still, good surface preparation is a must - especially on surfaces with cracks: most subtractive painting techniques require a thin glaze, which can easily seep into cracks and make them appear darker.
Color

More refined than sponging, negative rag painting offers effects from homey to sophisticated. But as with all decorative painting techniques, the key to a finish that looks elegant and tasteful is the color combinations of the base coat and colored glaze.
The standard style of ragging off is to overlay a glaze color a few tones darker than a pale background, and then to rag until there are no visible brush or roller marks left (although sometimes they can be left to make a feature).
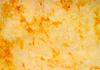
Soft neutrals over an off-white base will give the appearance of old walls. Darker shades over a lighter tone of the same color will create a dramatic, yet still elegant effect.
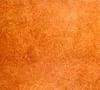
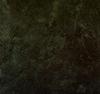
Done in deep, rich organic colors, a cloth-distressed surface can even look like leather.

Ragging
off can be done not only with a single glaze color, but also with two
colors at the same time, or with two colors in separate coats - to give
the finish some extra depth.
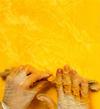
And if desired, the subtle quality of cloth distressing can be made more exuberant by employing bright, contrasting hues such as a red glaze over a yellow base coat - but you really need to know what you are doing to pull off such dramatic color combinations.
For beginners, it's best to avoid mixing totally different colors, as these combinations can easily look too sharp and gaudy.
Finish

The base coat for negative ragging must be done in a satin finish - this is important because a porous flat base coat will hold on to too much glaze, and anything glossier than satin as a base may cause your glaze to sag or even run.
For the glaze, you are free to choose any sheen you like, but know that a flat finish looks best on the ceiling, and both flat and satin treatments look great on the walls.
Semi-gloss and glossy surfaces show all flaws, where even tiny imperfections get magnified. Besides, high-sheen finishes look cheap when used on large planes - so reserve the gloss only to small and perfectly smooth areas.
Recipe

A clear glazing liquid must be added to the paint for ragging off, as the surface must stay wet long enough for you to manipulate the glaze with the rag.
Because this technique requires you to maintain a wet edge at all times, it's difficult to use it with water-based glazes on surfaces larger than 5 square feet.
So use this recipe only for small areas, such as the wall under the chair rail:
2 parts clear acrylic glazing liquid
+
1 part latex paint
+
1 part water

But even though the recipe above contains 50% of clear glazing
liquid (which prolongs its "open", or workable, time) it still dries too
quickly to permit work on large surfaces, and it will be difficult to
blend a new (wet) area into a previously worked one without creating
obvious overlap marks.
So when you need to rag off regular sized walls, an oil-based glazing mix will allow you more time than a water-based formula, because it takes much longer to dry:
2 parts clear alkyd glaze
+
1 part alkyd paint
+
1 part paint thinner (or mineral spirits)
NOTE:
like all other subtractive techniques, negative rag painting requires
you to apply - and then remove - a larger quantity of glaze than you
would use for most additive techniques. Keep this in mind when planning
how much glaze to mix for your project.
Basic and Advanced
Rag Painting Tutorials
Timing is critical because the glaze can be applied more quickly than it can be removed. Simulate the process beforehand to determine how large a section you and your partner can work on at one time, taking skill into account.
For small surfaces, however, 1 person can handle both parts of the process.
Practice on some test boards to check your color combination and get comfortable with the actual technique before you start on the main area.
Instructions for Basic, Single-Color Ragging Off
Ragging is one of the best known decorative techniques for many reasons: it is very adaptable, quick and easy to do, and needs no specialist tools. The …

Tutorial for Rag Painting with a Cheesecloth
Thin, gauze-like cheesecloth (the material used here to remove glaze) is what produces the subtle texture of this subtractive paint finish and offers a …
Ragging Plus Cheeseclothing: a 2-Step Glaze Removal Technique
Here is another elegant variation of cloth distressing. It starts with ragging off, which creates a coarsely textured finish, and ends with cheeseclothing …
Ragging Off and Cheesecloth Distressing in 2 Glaze Colors
Although similar to single color ragging and cheesclothing , this version of the same painting technique has a painterly quality to it. The job is a …
Light Over Dark Subtractive Rag Painting Method
When executed in two similar tones (a darker glaze applied over a lighter base), ragging off and cheeseclothing produce a subtle finish. But when done …
Painting Instructions for Decorative Rag Rolling Off
Subtractive rag rolling is a sophisticated, but also more challenging and time consuming technique than basic negative ragging, and the pattern it creates …
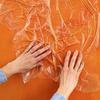
Ragging Off Paint With Plastic
Rag painting is not always done with cloth, sometimes other materials are used for a different effect. In this simple tutorial, you will use plastic …
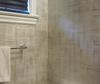
Cross-Hatch Ragging Off Paint Technique
Here is an interesting painting technique called crosshatch ragging. When completed, the decorative finish resembles grass cloth.
This technique …
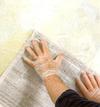
Parchment / Frottage Painting Effect Done With Newspapers
The decorative painting technique of parchment, or frottage, combines Old World texture with a soft yet contemporary attitude. Based on the French word …
Recommended:

Recommended:

See Also:
Examples of Ragging Faux Finish Techniques
Tips and Tricks for Ragging Faux Painting Finishes


Leave a Comment: