1 Color Rag Painting Tutorial - the Basic Technique

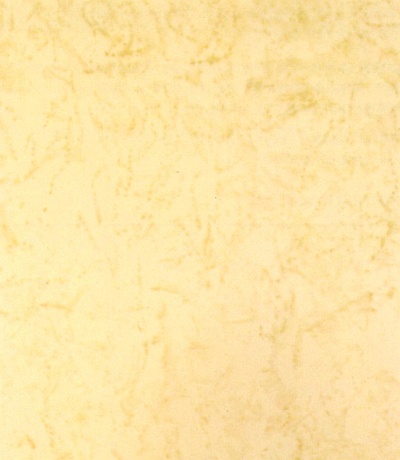
Rag painted finish in 2 similar tones
If you've ever tried the sponging on technique, basic ragging on will be easier for you to learn - both the instructions and the process will feel familiar.
The main difference and difficulty with this method is working with a rag - folding it with consistency and handling it with confidence.
Depending on the color combination you choose, and how you fold the rag, the tutorial below will let you create a variety of effects - from crushed velvet and leather-like crisp textures to more blended, blotchy, distressed looks on the walls and other flat surfaces.
NOTE: Before you start, go through these rag painting tips and tricks for some important pointers that will help make your project run smoother.
Tools and Materials
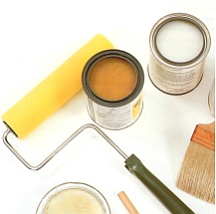
- paint tray (for the base color paint)
- paint brush (for cutting in the base color)
- paint roller (for applying the base coat)
- rubber gloves (latex paint is drying to the hands!)
- stirring sticks (for blending the recipe)
- blue painter's tape (for protecting surfaces not to be painted)
- clear acrylic glaze (it's part of the recipe)
- mixing bucket/container (for the colored glaze mixture)
- 2-foot measure of cloth (square shaped)
- latex paint in 2 colors (one for the base, one for the decorative glaze)
Preparation
Apply 1-2 coats of latex paint to the walls with a brush and roller as usual, and let dry. Remember that this base coat color will be one of the colors in the final finish.Once the base coat is dry, mask off the trim, ceiling, and baseboards with blue painter's tape to protect them from smudging.
In a plastic container, mix one part clear glaze, one part paint (in the second color), and one part water; stir until blended.
IMPORTANT: If you tweak the recipe to adjust the transparency of the color and/or the thickness of the mix more to your liking, make sure you write down all changes to the formula so that you can easily reproduce it (if you run out in the middle of your project).
Application
1) Wearing your gloves, immerse the rag fully in the glazing mixture, then wring. Wipe the gloved hand on the rag to avoid leaving any paint drips on the working surface.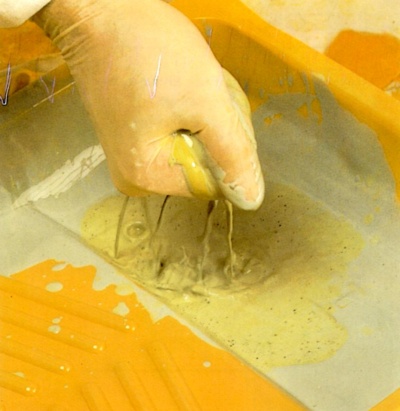
Bunch up the cloth in your hand in your desired arrangement, and hold it lightly, using just enough pressure to retain its shape and keep it from falling out of your hand.
2) Touch the rag lightly to the wall - don't squeeze!
When the rag is off the surface, move your wrist, and sometimes your whole arm, to shift the rag from side to side - this is necessary to prevent a repeatable pattern.
At the same time, use your fingers to rearrange the rag "pom-pom" in your hand to slightly change its shape for each stroke (you shouldn't be able to count how many marks the rag has left on the wall).
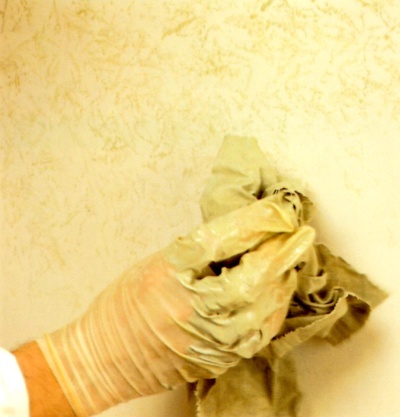
Gently pounce the bunched rag straight up and down over the surface (no dragging!), making sure each stroke barely touches the previous one.
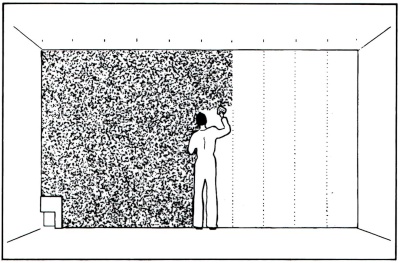
Keep moving constantly, but don't hop around. Work in 3-foot sections, moving diagonally from top to bottom down the surface in this fashion:
When pressing the cloth onto the wall no longer applies the glaze, reload your cloth with glaze and continue pouncing and re-positioning as before.
3) After you complete each section, step back 8 to 10 feet and evaluate the texture and consistency of your wall treatment. All strokes should show even pressure and appear to be random.
While the glaze is still wet, you can press a clean, slightly moist cloth onto any areas where the glaze appears too thick, or if you want to soften some harsh lines or edges.
Carefully rag on some more glaze onto the areas that look too thin.
4) At the end, go around the perimeter of the wall/room and carefully touch up the corners and edges - use one of the thinner sides of your bunched rag to really get into those tight places.
So, how did you do? Hopefully it wasn't too hard if that was your first decorative painting project.
And if you think you've made a mess, you can often correct your mistakes and make everything look great by ragging on another layer - in the same color (if you want to make the finish denser), or in a complementing shade if you need to "thin out" the texture.
But if you feel like you have a pretty good grasp of this basic technique, you are ready to move up to more advanced ragging processes that involve multiple colors, or a different hand motion.
Return to Ragging On Paint Techniques.
Recommended:

Recommended:


