Ragging Off and Cheesecloth Distressing in 2 Glaze Colors

2-color ragging can look like marble
Although similar to single color ragging and cheesclothing, this version of the same painting technique has a painterly quality to it.
The job is a bit more challenging not only because here you work with 2 colors, but also because this method involves some painting composition.
By standing back and studying your surface, you decide how much of the 2 glaze colors to use and where to place them.
Your goal is an effect that appears random yet has an overall balance to it when viewed from a distance.
TIP: depending on the chosen colors, the final effect can resemble marble. In fact, this finish makes a good background over which to execute some of the more involved marbling techniques.
And because it looks like marble, this finish adds weight to a surface visually, and for this reason works well on the lower half of a wall. So you might, for example, just use it on a dado and paint the wall above a solid color to let the decorative finish be the star of the show.
Preparation
In addition to the tools and materials listed in the basic ragging off tutorial, you'll need one more paint color (for the second glaze), and a few packages of cheesecloth (for the second step of the process).Prepare your walls and mix your 2 glazes as described in the same basic tutorial.
Also, review the cheeseclothing instructions for some useful tips before you start.
IMPORTANT: since you apply only a small amount of glaze in this method and work over the same area twice, it works best with oil-based paints and glaze - water based products will not give you sufficient time to finish the process before the glaze dries.
Application
1) With one side of your brush, apply the 1st glaze in a random array of squiggly lines (as shown below) to a 3'x3' area of the wall.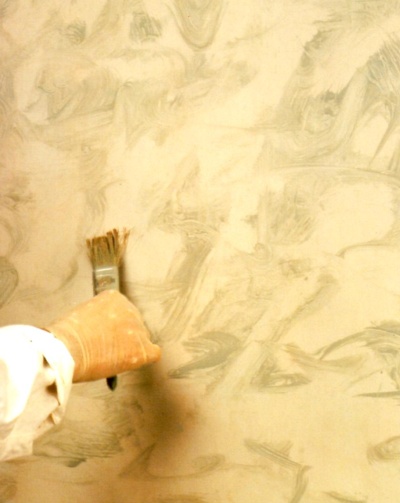
Vary the size and shape of your strokes, and apply some heavier than the others (so that the lightness/darkness of the color will be different as well).
Cover about 50% of the area, taking care not to create a recognizable pattern.
2) With the other side of your brush, fill some of the gaps in the 1st glaze with the 2nd glaze. The base coat should still be visible around all the brush marks in both colors.
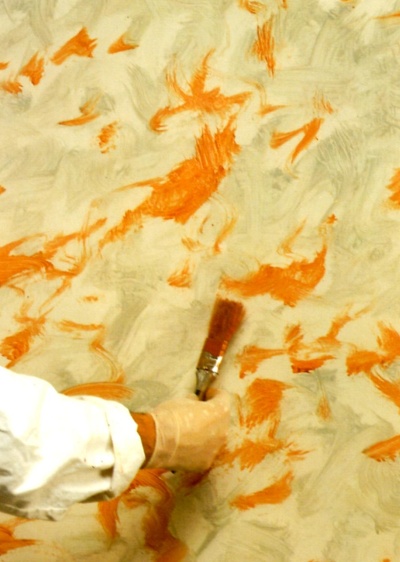
As with the 1st glaze, make random strokes that vary in size, shape and intensity. In some spots, leave the base coat showing; in a few others, let the 2nd color overlap the 1st glaze color.
3) Saturate your rag in solvent, wring it out completely (so it doesn't drip) and rag off over the entire section, flattening the brush strokes.

Every now and then, lightly drag the rag on the surface to combine the 2 colors.
You shouldn't see any defined brush strokes at the end of this step.
4) Immediately dry-cheesecloth over the same area to smooth the edges and blend the colors even more.
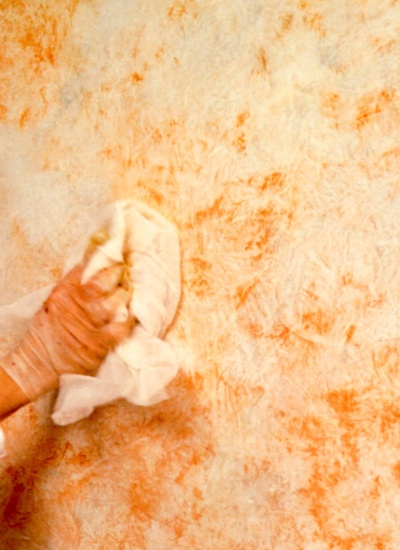
The fine texture of the cheesecloth will produce a cloud-like effect on the finish, but it's important not to overdo it - you want some of the splotches of color to still remain defined (how much is up to you - that's where your eye for composition comes in).
5) Repeat steps 1-4 on the next 3'x3' area, taking care to blend the joint line between the sections.
TIP: for an easier process (no need to blend the sections into one another) and an even more realistic effect, you could tape off each 3'x3' section and work them one at a time - this will create a faux marble tile look on your walls.
Return to Ragging Off Paint Techniques.
Recommended:

Recommended:


