Tricks of the Trade for
Painting Stripes On a Wall
When painting stripes on a wall, professionals use quite a lot of tricks to get the job done better, faster and easier.
Want to learn how to create razor sharp paint lines or save money on tape? Keep reading for the proven shortcuts and painting hacks.
Hacks and Shortcuts for
Painting Stripes on Walls:
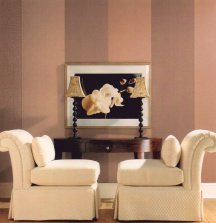
- Remember that the wider the stripes and the simpler the pattern
(e.g. a 2-color, 2-size stripe combination) the faster the job - from
planning to marking to actual painting.
- Plan your desired stripe pattern on graph paper before you start - this
seemingly unnecessary step will actually save you a lot of time and
frustration, and prevent disappointing mistakes.
Any stripe combination can be done in at least 2 ways, but you can find the most efficient one only by laying out each as a mock-up first.
Also, try to plan so that you will apply dark colors over light ones when possible (especially for wider stripes), because coverage is always better and faster this way.

- Choose
the negative technique if you are the kind of person who normally doesn't have a lot of time or patience for painting stripes on walls, and if you'll be happy with just 2 colors in the
pattern (this technique involves much less measuring, marking and taping).
First, create your "stripes" right on the walls using painter's tape (the size of the tape will determine the size of the resulting stripes) - the pattern you make and see now is exactly what you'll get after painting.
Then just paint over everything with an accent color. Once dry, remove the tape to reveal the smart and easy stripes in the basecoat color (that's why this technique is called negative).
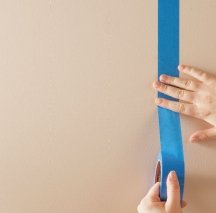
- Cheat where you can - if the walls were previously striped and then
painted over, the edges of the stripes should still be visible as
slightly raised outlines due to the paint buildup (just look very closely).
So if you are OK with the old pattern, simply tape along these old guidelines to save a lot of time on measuring and marking the walls. - See if you can get away with the existing base coat if you want to skip a big step in the stripe painting process.
If the paint still looks presentable (ok, maybe a few minor scuffs that can be easily touched up) and the color doesn't make you sick, you can save quite a bit of time and effort by painting new stripes right over the old base.
Adding a complementing accent color via stripes will completely transform the old look and no one will be the wiser that you "cut corners" and didn't roll on a fresh coat of paint before doing the stripes.
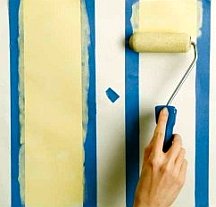
- Use paint leftovers from your other projects for painting stripes on a wall.
This will save you money on paint and gas, help the environment and let you finally use up some of the stuff that's been sitting in your garage for years (it's a great alternative to paint disposal).
Striping usually does not take a lot of paint, but if you feel you still don't have enough, you can always mix different paint colors together to create more paint.

- Never, ever mark your stripe pattern on the walls with an ink pen - it will bleed through
even multiple coats of paint (often through primer as well) and ruin
your paint job.
Chalk is the easiest to wipe off at the end of the project, but use a very light hand - otherwise the paint may not stick to the chalk marks.
You can also use a pencil to make light, barely-there marks when working with mid-tones, but a pencil outline may remain noticeable on very light paint colors (depending on how precisely you apply tape along the lines). - Mask the ceilings, floors and trim using a wide tape (at least 2" wide) -
that way you won't need to cut in with a brush first (you'll just use
the end of your mini-roller to get in the corners as you are painting
the stripes).
Fewer tools, simpler process, faster cleanup.
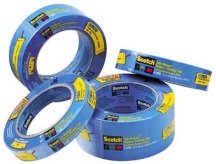
- Buy only low-tack, delicate or special masking tape designed for painting stripes on a wall (most others are too strong and may rip off the base coat when you remove the tape).
Frog tape is more expensive but creates cleaner lines than the traditional blue painter's tape, but both need to be sealed properly (you can't just slap it on and expect sharp lines). - Save money on tape by reusing it - yes you can!
Just tape half the room, paint the stripes and remove the tape when the paint is dry to the touch.
Then use the same tape again on the second half of the room - but make sure to really seal the edges this time.
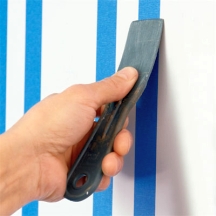
- Minimize paint seepage by using the back of a plastic spoon (or a similar firm but flexible object) to press and run along the working edge of the tape, and make it adhere to the wall better.
For truly razor-sharp and clean lines and to prevent seepage completely, paint just over the working edge of the tape using the color that's underneath the tape. Let it dry, then proceed as usual.
And try to always use a single piece of tape for each stripe instead of linking shorter strips together (because every seam is another chance for paint to seep under and give you jagged edges).
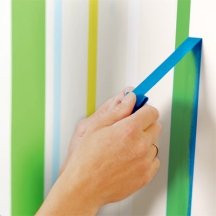
- Remove the tape as soon as the paint has started to dry - that
sweet spot when it hasn't yet hardened, but is no
longer easily smudgeable.
It's better not to wait too long because while the paint is still fresh, you may be able to clean up any bleeding marks with a wet cloth or paper towel wrapped around your fingernail (instead of having to do touch ups).
Pull the tape steadily without yanking, at a 45 degree angle to the wall to avoid tearing it (picking out those bits of tape left in the finish is NOT fun).
Have your own tip, trick or hack for painting stripes on a wall? Share it in the comments below!
See Also:
Decorative Paint Striping Ideas
How to Paint Stripes Without Taping
Creative and Unusual Ideas for Striping Paint



Leave a Comment: