How to Touch Up Paint
in Your Home
Before teaching you how to touch up paint on the walls, ceilings and woodwork in your home, it's important to note that the success of a touch-up job depends on many factors - from the surface to the finish to the application technique.
Generally, a flat paint finish is the easiest to touch up, and the higher the paint sheen (the glossier the paint), the more difficult it is (if not impossible) to touch it up without leaving a visible spot.
But even on flat paint touched-up areas may show for many reasons, as you can see below.
Paint Touch Ups May Fail If...
- The original color on the walls has faded with time or from the sun (then even the same paint applied over it will look different).
- You didn't save the original paint for touch ups and had to order a new can (different paint stores may mix the same paint color slightly differently, and even when re-ordering from the same store the color may not match exactly if their machine needs tuning).
- Only 1 coat of paint was originally applied (the touched up spots will look darker because they will build up the color).
- The leftover paint was not stored properly (some ingredients may have deteriorated and affected the color).
- You didn't stir the old paint well enough (some ingredients may have settled on the bottom and now the color formula is not the same).
- The paint color for touch ups was matched (if you don't know the original paint color name, you can never match it exactly and even the slightest difference will be obvious).
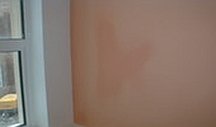
In addition to these, you should know that some products (formulations) and some colors (especially deep base colors) are very difficult to touch up and there is nothing you can do about it.
Also
keep in mind that low flat ceilings and side walls with a source
of light at the end show touched up areas as blotchy spots with a
different texture - because of that unfortunate lighting and viewing
angle.
But it also depends on how picky you are about the final result - what's a sloppy mess and unacceptable to one homeowner is a perfectly fine job to another.
How to Touch Up Paint
On Walls and Ceilings
Touching up is unpredictable business, and sometimes the only way to touch up an area invisibly is to repaint the entire wall corner to corner.
But it doesn't hurt to try, so here's how to touch up paint the right way:
1. Repair the damage
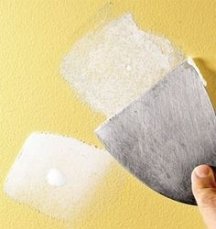
If the surface is damaged, you need to repair it before touching up -
don't count on paint alone to camouflage the problems, and you really
don't need another reason for your touch ups to stand out.
So first, patch any holes, dents or deep scratches with compound.
Then, when the patches are completely dry, sand them until perfectly smooth before proceeding with primer or paint.
Remember that you can't sand them once they are painted, and will have to live with the rough/bumpy spots or start over if you forget or ignore this step.
2. Prime the repairs
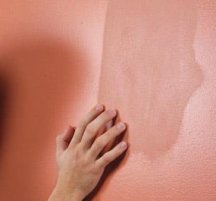
All spackled areas should always be primed before painting, because if you paint right over them, the paint may not stick properly and will flake or peel off (especially if the paint has a sheen).
Another possibility is, the paint will soak into the patch and look like a dull blotch compared to the rest of the finish.
Just adding another coat of paint
will not solve this problem and may even create another - the same dull
spot but now with a paint buildup around it.
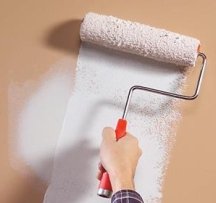
To avoid this mess, apply a thin coat (to avoid creating texture or buildup) of drywall primer to all repaired spots.
You can use a mini foam roller (because it has the lightest coverage and finest finish) for sealing larger areas, or an aerosol primer when you need to target small spots, or need it to dry faster.
Also, always prime any greasy stains, ink and crayon
(for that you'll need an oil-based stain-blocking primer) and rust
(using a special rust-blocking primer) - otherwise the stains will
reappear within days.
3. Touch up the paint
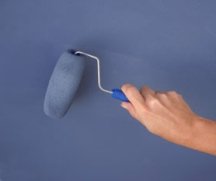
First of all, stir the leftover paint really well and strain it if needed.
Next, make sure you use the original application method - brushing for the areas that were originally painted with a brush, rolling for the areas where the paint was rolled on.
With rollers, try to use the same type that was used originally (foam, short nap, long nap, etc) - this will also help match the original texture and make the touch ups blend in better.
For larger areas, you can use a standard size roller, but for smaller spots a mini-roller (4 1/2" wide or smaller) is best.
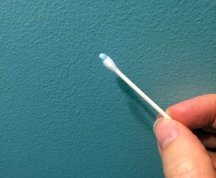
And for really tiny scuffs on the walls where using a paint roller is not justified, try dipping a small, blunt-end artist's brush (or a Q-tip) into the paint and dabbing it on the worn spots - this will imitate the texture of a roller and help the new paint blend in.
Also, do not load the brush or roller with paint - when doing touch-ups, less is more. Your goal is to feather out the edges of a touch-up area, and you can always add more paint or apply a second coat if you need to.
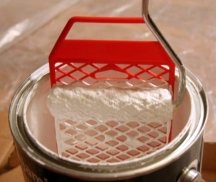
The best technique is to cover the roller with paint, then run it on a grid to work the paint evenly into the nap and get rid of any excess (and of course, wipe off any excess paint when using a brush).
Then, apply the roller/brush right in the middle of the area that needs painting and work from the center out, trying to blend the new paint into the old one.
Once the paint is dry, you may need to add a little more to any spots that were not covered well - for that, use a small blunt brush and pounce it on the spots to add some extra paint just where you need it (another coat with a roller may build up too much paint on the areas that don't need it).
How to Touch Up Paint
On Woodwork
Woodwork is usually easier to touch up invisibly because the surfaces are smaller (and not as much in your face as walls), more detailed (making imperfections less visible) and the wood grain texture is just more forgiving.
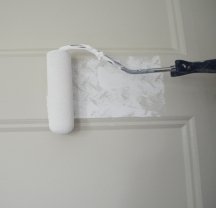
The most important thing here is to make sure you use the same exact
paint that was originally used - not just any semi-gloss white - because
not all whites are the same!
Another key is to brush the doors and trim that were brushed, and roll those that were rolled, to match the existing texture.
For the most invisible results on doors, it's better to repaint the entire plank or panel that has marks/scuffs (seam to seam or edge to edge - not just spot touch ups).
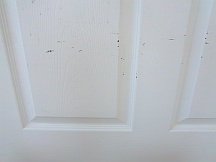
But flat
doors might need to be repainted top to bottom - they are almost impossible to touch
up invisibly because of the single plane (which doesn't have any place to stop, and the glossy paint finish will show
everything).
And of course, just like with walls and ceilings, prime any serious stains before painting and try to feather out the edges as best you can.
See Also:
Removing Mold and Mildew Stains from Paint
Caulking and Painting: 4 Little-Known Benefits
Types of Paint Finishes for Exterior House Painting



Leave a Comment: