Painting Ceilings
to Change Their Height
Did you know that just by painting ceilings creatively, you can visually change their perceived height?
The following tips will show you how to make your ceiling appear higher or lower than it really is (with a strategic use of color), and improve the look and feel of any room.
Painting Ceilings for a Higher Effect
When painting ceilings for a higher effect, the goal is to create an illusion of uninterrupted vertical flow between the ceiling and walls without sharp horizontal lines or contrasts, and eliminate anything that draws attention to the low ceiling.
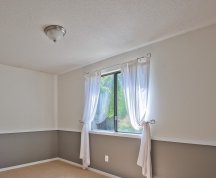
- Avoid big contrasts between the wall and ceiling paint colors.
If your walls are painted a rich or deep color, a pure white ceiling will seem even lower because of the sharp horizontal line that the two colors will create where they meet.
Instead, paint your ceiling the same color as the walls (if the walls are light), or a couple of shades lighter (if the walls are a mid-tone or dark color).
In rooms with a chair-rail, you only need to paint the upper part of the walls the same or a similar color to the ceiling in order to create this vertically elongated, flowing look.

- Paint the crown moldings (if you have them) the same color as the walls.
If there is a high contrast between the wall and ceiling color (e.g. you ignored the advice above), this will help make the walls look a little taller and push the ceiling up a bit.
But even if your walls and ceiling are painted the same or a similar color, you still need to match the crown molding to the walls (or use a shade in-between the wall and ceiling color for a gradient effect) because a different/contrasting molding color will interrupt the vertical line again.
To maximize the effect, use the same sheen for painting the crown molding that you used for the walls (usually flat or satin) - you don't want the gloss to stand out and distract or stop the eye if the walls have a dull finish, for example.

- Painting ceilings a light cool color (for example, a pale
blue wash or a subtle aqua tint) will make them seem more distant, and create a feeling
of more space overhead in the room.
This idea works best in rooms with white or light-colored walls because of the same contrast issue that was explained above (e.g. avoiding a strongly defined ceiling line).
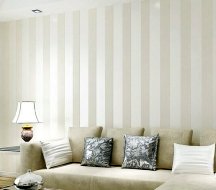
- Paint vertical stripes on the walls to visually elongate them and raise the low ceiling (and of course, create a timeless, classy look at the same time).
It's important that the stripes are narrow and tone-on-tone (meaning 2 similar colors, or even the same color used in different sheens), with one of the stripe colors matching or very close to the ceiling color to blend them.
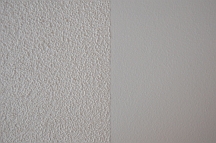
- Remove the popcorn or any other thick and rough texture from your ceiling (especially if it's old or failing).
In addition to making it look more current, this will add a few inches of perceived height to your ceiling (even though the texture removed will amount to less than an inch thickness).
Painting Ceilings for a Lower Effect
If your problem is a ceiling that looks disproportionately high or makes the room feel empty and cold, you can create a cozier, more intimate environment with these painting tricks:

- Paint the ceiling a darker color than the walls - the deeper the color, the closer it will appear, but it doesn't have to be a navy blue or black (although these are very popular, chic and effective choices).
If the walls are light, you can go drastically dark with your ceiling, or you can use a color that is only a couple of shades darker - both options will create a lowering effect.
But if the walls are already dark, it's usually best to use the same color on the ceiling (instead of an even darker shade) - this will create an enclosed, box-like effect and make the high ceiling virtually "disappear" as a problem (if it ends up feeling too claustrophobic for you, paint the crown molding a different color to re-create the ceiling line without undoing the lowering effect).
Just keep in mind that a dark ceiling should relate to something down in the decor - it should repeat one of the existing colors to look connected to the rest of the room (when it's ungrounded, the dark color will look out of place and only draw unwanted attention instead of helping).
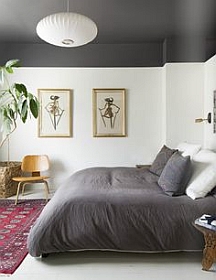
- "Drop down" the ceiling by painting the crown molding the same
color - this is a more conservative alternative to painting your ceiling
a dark shade (but it will work either way).
To lower the ceiling line even more, drag the ceiling color down the walls (a few inches or even a couple of feet down - depending on how high it is and how close you want to make it look).
This idea works best when there is a high contrast between the walls and the ceiling color, and for an even stronger definition, you can also accentuate this new, lower ceiling line with a wallpaper border or crown molding.
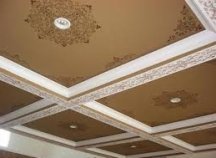
- Use decorative finishing techniques for painting high ceilings (stencils, trompe l'oeil,
gilding, etc) - this will visually break up and fill the overwhelming clean, blank slate, attract positive attention and draw the ceiling closer to you.
Painting ceiling beams with a background in a contrasting color will have a similar lowering effect.
See Also:
Painting Rooms to Manipulate the Space
Decorative Painting Techniques for Ceilings
Decorative Interior Painting Tips for Foyer Walls


Leave a Comment: