How to Paint Stripes
Without Taping the Walls
Would you like to learn how to paint stripes on the walls the lazy (or creative) way?
Then you will love the following 5 simple techniques that produce unique wall striping finishes and don't require you to tape off the patterns.
NOTE: Before following the instructions below, apply the base paint color first, and let it dry overnight.
And don't worry if the stripes don't come out perfectly straight; these are free-hand painted finishes, not wallpaper, and they are supposed to have character.
How to Paint Stripes
the Lazy Person's Way
Hand-Painted Wall Stripes
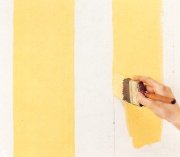
Measure and mark your stripes using a plumb line, a measuring tape and a pencil (see "Painting Vertical Stripes" to learn how).
For a charming, hand-painted look, simply paint the stripes right on the walls using an angled brush - start by tracing the edges of the guide lines, then fill in.
It works best to work from the top down, and paint in about 12-inch sections to maintain a wet edge.
If necessary, apply a second coat after the first one is thoroughly dry.
Roller-Painted Wall Stripes
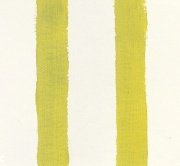
This paint striping technique is done with a roller - you'll have to find one that matches the size of the stripes you want... otherwise the stripes will automatically come out the size of whatever your roller's width is (surprise!).
First, lay out the desired stripe pattern on the walls.
Then roll on the paint using the mark lines on the walls as a guide for your roller path.
Paint one stripe at a time, stopping and touching up the areas under the ceiling and above the baseboards with a brush.
The finish will look best if you do it in 2 different shades of the same color (a tone-on-tone combination).
Dry-Brushed Wall Stripes
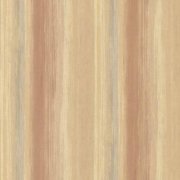
Now this method can be a little messy, so you'll want to mask the ceiling, baseboards and trim (to avoid smudging them with the paint).
Draw your stripe pattern on the walls as usual.
Using a stiff dragging brush that has been dipped into paint and wiped off (in other words, a semi-dry brush), run it up and down the marked guidelines on the walls (in a dusting or whitewashing motion).
For the best results, use a brush that is the same width as your stripes (or turn your brush sideways to create thin stripes).
Multi-Color Rolled Stripes
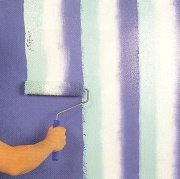
You don't need to measure or mark the stripes with this tri-roller technique, but make sure to protect the ceiling and baseboards with wide masking tape before you start.
You'll need a special roller and tray set that allows you to use 3 colors at the same time (the roller may look like 3 mini rollers on one frame, and the tray will be divided into 3 compartments).
Here's how to paint stripes in 3 colors all at once: fill one of the tray's compartments with the base color, and the other two with 2 different accent stripe colors.
Start in the corner and run the roller strictly up and down the wall, working in one strip at a time. Reload the roller, reposition it to meet the edge of the freshly painted strip and repeat the process.
You may need to use a brush to touch up the corners near the ceiling and baseboards if the roller didn't get them.
Combed Wall Pinstripes
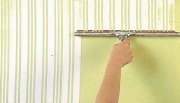
To get this look, you will need a special dragging comb, or a regular squeegee (those used for window cleaning) that has been cut grooves into.
It's hard to get straight lines on full-sized walls using this method, but it's pretty easy on short walls (such as those divided by a chair rail).
Mask the ceiling and baseboards (or chair rail) before painting (no need to measure or mark the stripes here).
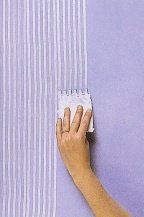
Next, mix a colored glaze (2 parts latex paint, 2 parts water-based clear glaze, 1 part water) and apply it with a roller in a strip that is a little bit wider than the size of the squeegee/comb.
Starting in one corner and using a steady hand and firm pressure, place the dragging tool at the very top and pull it through the glaze all the way down, in one motion.
Wipe the excess glaze off the tool and apply more glaze to the next section of the wall. Repeat the process, remembering to wipe the tool every time before dragging it through the next strip of glaze.
This technique works best over a satin finish base coat (because it has just the right amount of glide to it).
See Also:
Decorative Paint Striping Ideas
How to Paint Stripe Combinations
How to Paint Horizontal Wall Stripes



Leave a Comment: