How to Sponge Paint a Single Glaze Color - Basic Instructions

Final result: 1 color sponged-on finish
Positive sponging done in a single color is probably the easiest and quickest decorative finish to learn and create.
It basically involves dipping a sponge in some decorative painting glaze and dabbing it on the wall.
Large areas can be covered relatively quickly (because with a single top-coat color, you are going over the surface just once), so it is a satisfying technique for first-timers.
The only difficulty here is maintaining an even coverage - applying the glaze without establishing a pattern that looks too obvious or geometric.
As with most decorative finishes, individual strokes shouldn't be visible when this technique is done right.
Tools and Materials:
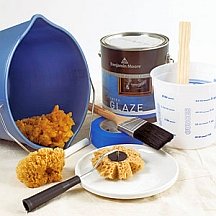
- a natural sea sponge for overall application
- a small piece of the sponge for tight places
- a paint bucket where you'll mix the recipe
- stirring sticks for blending all the ingredients
- a measuring cup for staying consistent with the recipe
- paper plates, old newspapers or a paint tray to unload excess paint from the sponge
- a bucket of water for washing and keeping the sponge in between the uses
- latex paint in the base-coat color (unless you are sponging over the existing paint)
- latex paint in the top coat color(s)
- clear acrylic glazing liquid for a semi-transparent finish
- rags or paper towels for cleaning up little messes
- rubber gloves to protect your hands
Preparation:
Apply the base-coat paint to the walls and let it dry (at least overnight).Mask the walls, ceiling and woodwork adjacent to where you'll work, and protect the floors with drop cloths.
In a plastic container, mix 1 part clear glaze, 1 part water, and 1 part paint (in your top-coat color), then stir until all the ingredients are blended.
Application:
1) Pour some of the mixture into a roller tray.Moisten the sea sponge in a bucket of clean water. If the sponge is new, work it in the water several times until it becomes loose and pliable. Squeeze all the water out so that it's just damp, but not dripping.
Wearing rubber gloves, dip the sponge into the glazing mixture in the tray, only covering its surface on one side.
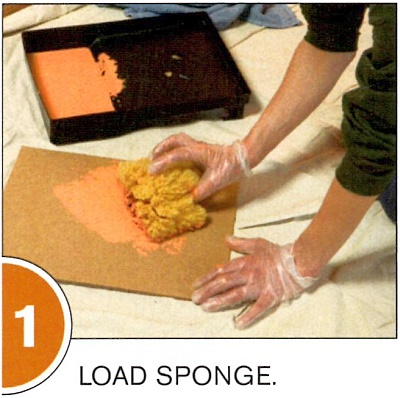
Blot off the excess glaze on the upper portion of the tray (you can also use old newspapers, a piece of cardboard, or even a disposable paper plate for this step).
2) Starting in an upper corner (or other logical starting point), dab the sponge on the wall lightly.
Lift your hand, rotate your wrist, and slightly reposition your arm.
Dab lightly again, joining the edges of the previous imprint.
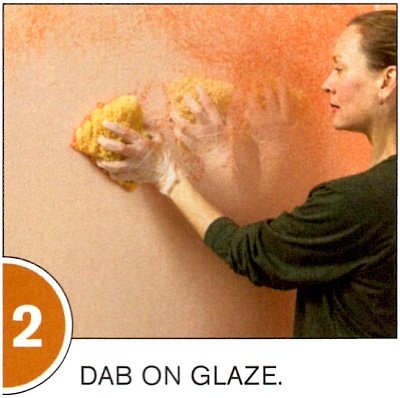
Use different parts of the sponge to dab against the wall so that the pores of the sponge don't become overly consistent and obvious.
Refill and blot your sponge as soon as you notice your dabs start to fade.
Continue this motion, creating an ever-larger area of applied glaze.
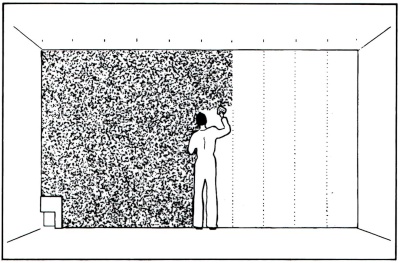
TIP: it's easier to cover the surface consistently if you work top to bottom, in 3'x3' sections like this:
3) When sponging on in a corner, or around windows and trim, tear off a chunk from the large sponge (approximately 2" in size), and dab on the glaze in these areas with the smaller piece (use the same motion).
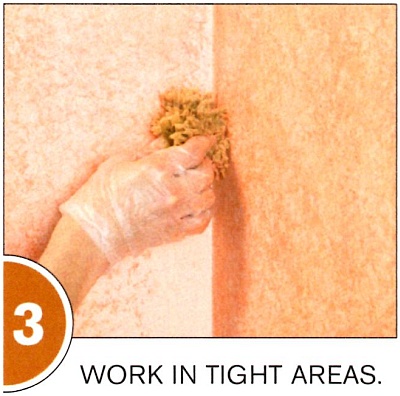
You can do this as you go, or you can leave the corners and other tight spots for last (to finish at the same time as you touch up the main area at the end).
4) After you sponge on a 3-foot-square section of the wall, step back 8 to 10 feet and survey the overall texture and consistency of your sponging.
You should not be able to discern any distinct edges or pores from the sponge.
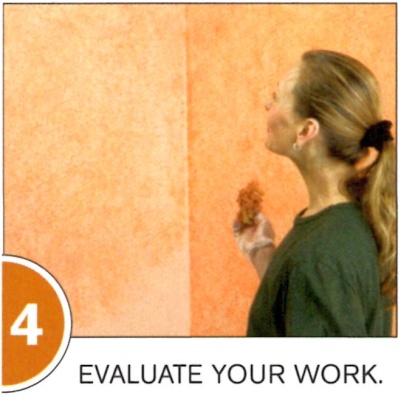
For areas where the glaze appears too heavy, immediately dab it with a clean, slightly damp sponge to remove some of the build-up (water-based products dry very quickly, so check your work progress often and correct mistakes quickly, while the glaze is still wet).
Continue on to the next 3-foot section, repeating the process, until you've covered the entire working area.
For those spots where you notice too much of the base-coat color still showing through, sponge on some additional top-coat glaze to blend them in.
...and that's it - you've just completed your very first, basic sponge painted finish.
Now clean up the tools and messes, wait for the paint to dry, remove the masking tape and enjoy your beautiful work!
NOTE: The effect can be varied by leaving larger spaces between the sponge marks, overlapping the imprints, or by reversing the base and overlay colors for a different effect.
And of course, you can build on this simple technique and achieve innumerable variations by experimenting with sponging additional colors over the dry glaze coats, or even applying a second color while the first color is still wet.
Return to Sponging On Paint Techniques.
Recommended:

Recommended:


