How to Sponge Paint in the Corners and Tight Spaces

Handling corners when sponging
Question:
How exactly do you sponge paint in the corners and other tight spaces?I'm afraid of making a mess and ruining my finish (and then I'll have to start over)!
Answer:
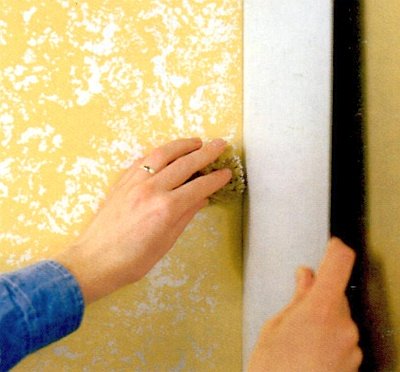
To work the corners, you'll need a small piece of sponge - about 2 inches in diameter.It's much easier if you do one wall at a time, and tape off the adjacent walls to prevent glaze from getting on them (or use a cardboard as a shield).
- When sponging ON, you can fill in the corners as you go, or you can do them all at once at the end of your project.
Do not cut in the corner! That sounds obvious, but you'd be surprised at how many people do that.
Load the small sponge with some glaze (don't oversaturate it - blot any excess on a rag) and dab it lightly into the corner, using the exact same technique you used for working the main wall area.
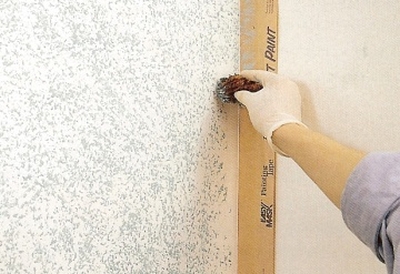
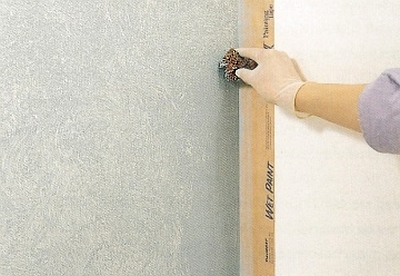
- When sponging OFF, you'll need to take care of the corners as you go - you can't come back to them later because the glaze will be dry by then.
Cut in the corner with a brush (just in your immediate working section, as you get to it). While you are working with the large sponge, intermittently dab the small piece into the corner to continue the pattern on any remaining small areas of glaze.
Work with one sponge in each hand, or alternate between them - whichever you find more comfortable.
NOTE: handle the join between a wall and ceiling, crown molding, floor or baseboard the same way you do a vertical corner.
Click here to ask your own question about sponge painting.
Return to Sponge Painting Q&As.
Recommended:

Recommended:


