Paint Instructions for Sponging On with 3 Glaze Colors

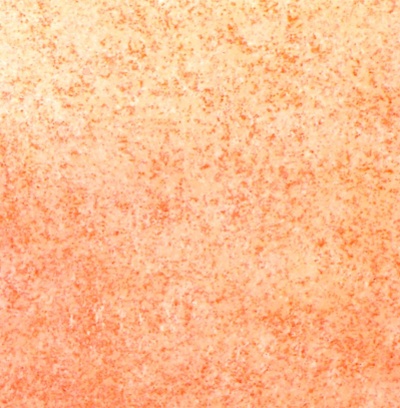
3 sponged on glaze colors create a dense finish
This version of the paint sponging technique results in an even denser finish than the 2-color sponging on method, so less of the base coat will show through.
Here, you use 3 different color glazes (dark, medium and lightest) over a light base coat.
In the following tutorial, the glaze colors used are a chartreuse tone, a rusty shade, and a white accent tint, with a soft creamy beige color underneath it all.
TIP: A good way to give some extra depth to a multi-colored sponged on finish is to employ several tones of the same hue.
You can easily create the tones yourself (no need to buy several cans of paint) by adding various amounts of white paint to whichever starting color you choose.
Preparation
Follow the steps in the basic sponging on tutorial for preparing the surface and working area, and mixing the glazing recipe for each of the 3 overlay colors.Application
1) Pour the medium-toned glaze into a roller tray. Soften the sponge in a bucket of clean water, and wring well.Gently dip the dampened sponge into the glaze, flat side down. Off-load the excess onto a newspaper before applying the glaze to the surface.
Begin sponging on the medium color glaze and make your first strokes subtle.
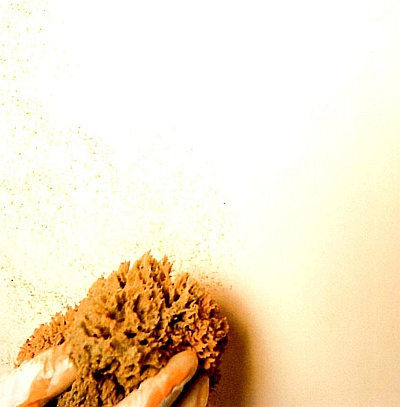
Cover the entire wall surface, corner to corner, working in 2-foot-wide vertical strips. Let it dry.
Rinse out the sponge, change the liner in the paint tray, and refill the bucket with fresh water.
2) Fill the tray with the darkest glaze and soften the sponge in water again.
Go over the surface with this glaze, but apply it in horizontal 2-foot-wide strips this time, top to bottom. Try not to create an identifiable pattern.
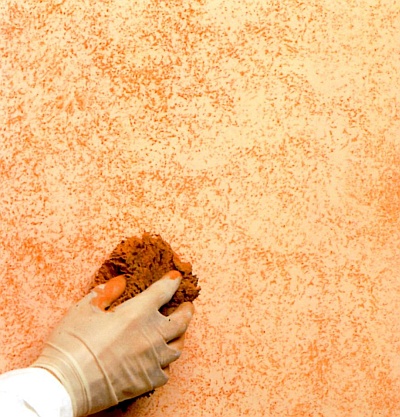
Reload and off-load the sponge often to maintain a consistent look. This step covers about 60% of the base coat. Let the glaze dry.
Clean the sponge and tray, and change water in the bucket once again.
3) Repeat the process with the lightest color glaze. Put it on in 2-foot-wide vertical strips from top to bottom again.
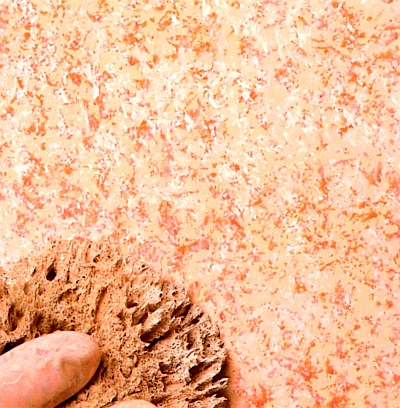
The final finish should reveal about 10-20% percent of the base-coat color.
Stand back from the walls and check your final effect for evenness - you shouldn't be able to count the number of times the sponge has marked the surface.
Touch up any uneven spots with the darkest or lightest glaze, as needed.
Return to Sponging On Paint Techniques.
Recommended:

Recommended:


