Storing Paint:
How to Keep Leftovers Fresh
When it comes to storing paint leftovers, there are best practices as well as mistakes you can make - from temperature conditions to the choice of container to even placement of the can.
Many people don't give much thought to how they store paint, but then become disappointed when the paint they've been counting on has gone bad and become unstable, or even worse - ruined the floor underneath and created a big mess.
Properly stored, paint will remain usable for at least 5 years, so here is how to do it right to keep those leftovers fresh until you need them again for repainting or touch ups.
Tips and Instructions
for Storing Paint Properly
Mark it
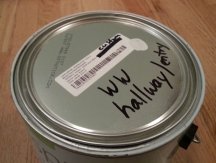
Before you put your paint away for storage, don't forget to mark each paint can with a permanent marker - what room or surface the paint was used for, and the name and number of the paint (if this information on the lid has become smudged or covered by paint).
It's best to mark the body of the can because the lids are often lost, damaged and replaced, or mismatched (especially with similar paint colors - you don't want to accidentally use trim semi-gloss to touch up your ceiling, for example).
Also, make sure there is a paint dab on each can (both on the lid and side) to show you what color is inside for easy identification, and to verify that the lid matches the can correctly.
Repackage it

Paint keeps better in full containers where it has less contact with air.
So when you have just a little bit of paint left (for example, just enough for touch ups), it often makes more sense to transfer it to a smaller container for storage than keeping it in the original packaging.
Those 1-gallon cans are not only bulky and take up a lot of space, but they also allow more paint surface to come in contact with air due to their size, so the paint dries up faster.
And professional painting contractors often buy paint in 5-gallon buckets (which are even worse for storing paint), so if you get to keep the paint leftovers, ask your contractor to decant the extra into a more reasonable container, or do it yourself.
You can reuse an old quart-sized can for that purpose (that has been completely cleaned out and thoroughly dried) or buy a new one in any paint or home improvement store.
Storing paint leftovers in canning jars also works fine - you may already have them around the house in various sizes to fit the amount of paint you have (the glass jars let you easily see the contents and are just pretty to look at).
Seal it
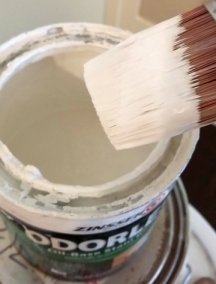
Before closing a paint can or a jar, be sure to wipe clean all paint residue from the groove/rim - that will make it easier for you to open it when you need to, and not let the air in by making the lid fit tight.
To create an even tighter air seal and prevent metal-to-metal corrosion, you can take a plastic bag and cut out a circle larger than the opening of the paint can, and use it as a gasket under the lid.
Also, don't hammer the lid directly (and especially in the middle) when trying to close the can - this can distort the lid and disrupt the air seal.
Instead, use a rubber mallet to tap around the edges of the lid, or place a block of wood on top of the lid and hammer the block to set the lid firmly into place.
Cool it
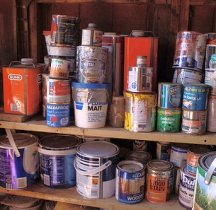
First of all, paints in tins should be stored in a dry place, off the ground or concrete floors (that includes glass jars with tin lids) - to keep the metal from rusting and ruining the paint inside or the surface underneath.
It's also best to store paint in a cool area - but don't allow it to freeze, or it will permanently separate and become unusable.
Keep it away from direct sunlight or other heat sources (water boilers, radiators, heaters, etc) that will speed up paint's deterioration.
The above requirements usually mean that storing paint in an unheated garage, crawl space, shed, wet basement or hot attic is not a good idea, but a cool and dry utility closet, mud room or laundry room should be fine.
Re-use it
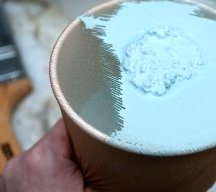
Do not shake an old can of paint before opening it to avoid mixing the contents with any dust, rust or debris from the deteriorated interior of the can.
And when you open it, first always check for paint "skin" that may have formed on the top (especially if the paint has been stored for longer than a year, or wasn't sealed properly).
Carefully and thoroughly remove this film (check the edges) with a stick or spoon before stirring the paint, or you'll end up with a paint full of junk.
Sometimes this paint "skin" is impossible to remove in one piece (the thinner the film, the more likely it is to break into many pieces) - in that case, you need to strain the paint before using it.
Actually, it's a good rule of thumb to strain old paint any time you are not sure about its purity - it is a messy step but it surely is much easier than having to pick out a million of bits and pieces from your freshly painted walls.
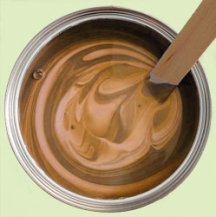
NOTE: some house painters recommend storing paint cans upside down, but here's the problem with this method: the paint may leak, or the "skin" may form on the bottom of the can when it is stored this way. And when you open the can, this "skin" - not visible to you - will inevitably get stirred into the paint, and ruin your new paint job.
It's very important to stir paint really well (by hand or with a mixer attached to a power drill) every time before use to recombine all the ingredients that may have separated or settled on the bottom - otherwise the paint color will not match (which is a disaster for touch ups).
And if the paint can't be re-blended to look normal no matter how long
you mix it, it means it's turned bad (become unstable). You shouldn't
use such paint because it will not perform or look as it should, and may
even create a lot of problems.
If some of your paint has gone bad or you have leftovers that you are not going to need again, please learn about the right paint disposal methods and different options before just throwing it away.
See Also:
How to Get Free Colors to Paint Your House
Removing Mold and Mildew Stains from Paint
Oops! Designer Paint Colors On a Bargain Budget



Leave a Comment: