Ragging Plus Cheeseclothing: a 2-Step Glaze Removal Technique

Ragging with cheeseclothing create more depth
Here is another elegant variation of cloth distressing.
It starts with ragging off, which creates a coarsely textured finish, and ends with cheeseclothing which results in a softer, more toned down and blended final look.
NOTE: this painting technique works best with a base coat and glaze that have good contrast - it's because in this method you go over the surface twice, blending the colors thoroughly (the distinction between low-contrast tones would blur too easily, and the finish would lose depth).
Preparation
To prepare for this project, see the basic ragging off tutorial for the glazing recipe and a list of tools and materials you'll need (just add cheesecloth - about 2 packages per medium sized wall).Also, go over the basic cheeseclothing tutorial for some tips and pointers specific to that painting method.
IMPORTANT: you must work fast on this technique because you have to go over the glaze twice before it dries.
Use oil-based paint and glaze in your recipe, and work with a partner to speed up the process (the partner will apply the glaze, you will texturize it with rags and cheesecloth).
Application
1) Apply the glaze with a brush to a 3'x3' area on the wall.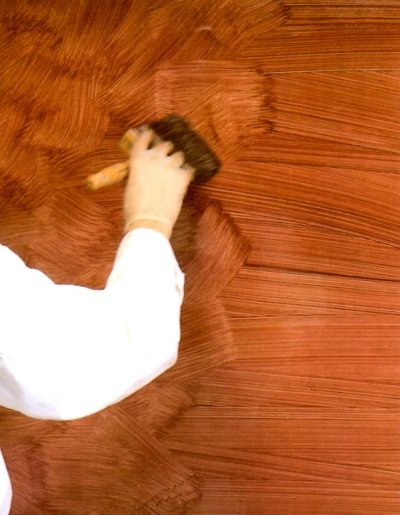
Work in a criss-cross manner - first side to side, then diagonally across with sharp, angled strokes to break up the strie effect. This will create a textured background and set the glaze, so that it doesn't run.
2) Rag off over the entire glazed area as usual: pounce a bunched up cloth with straight up-and-down movements, turning your wrist and shifting the cloth in your hand (in the air) to vary the imprints.
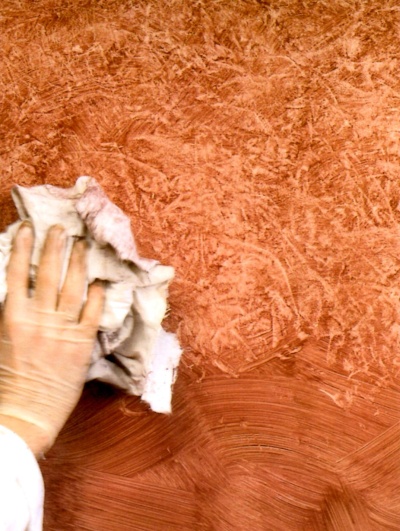
If a pattern develops, pat it out, brush on some more glaze, and pounce the wet area again.
But don't worry about being perfect and don't be afraid to rag off vigorously - the next step will help correct some imbalances and temper the rough textured effect.
3) Once the section has been ragged off, immediately take a clean cheesecloth and go over the same area again to soften and blend it.
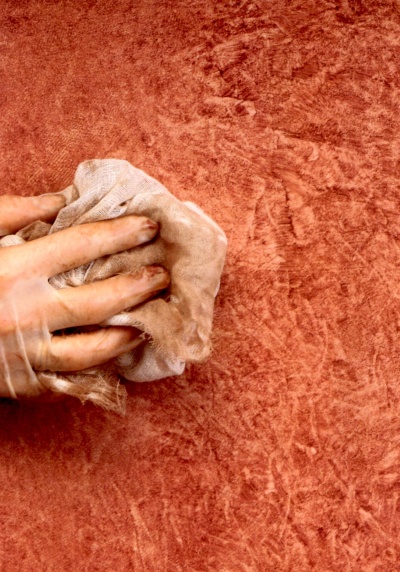
Every few strokes, lightly twist the cloth as it touches the surface to smooth the pattern's edges and add some more dimension to the finish.
4) Repeat steps 1-3 on the next 3'x3' area, paying extra attention to the corners, and patting out the demarcation line between the sections.
Remember that what you see now is what you'll get in the end, so correct any mistakes immediately, while the glaze is still wet.
The two-step glaze removal process creates a subtle look that has more texture and depth than that produced by either plain ragging off or cheesecloth distressing alone.
But if you want to take it to the next level, try the 2-color ragging and cheeseclothing method.
Return to Ragging Off Paint Techniques.
Recommended:

Recommended:


