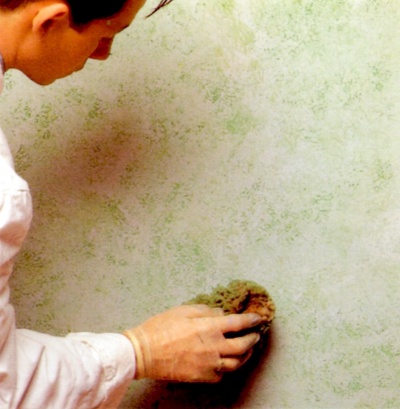
Dense One-Coat Sponge Painting Technique

One-coat sponge painting application
Question:
Is there a way to create a very dense sponging finish, without having to apply multiple layers of glaze?In other words, is it ok to just sponge heavily once vs lightly several times?
Answer:
Yes, you can do that. But although a one-coat heavy application method may seem faster, it actually takes more skill and patience to do right, because it requires you to feather sponged areas into each other.Here's how to do it:
1) Dip your sponge into a shallow pan of glaze, and blot excess paint onto a rag.
2) Starting in one corner of the project surface, dab the glaze onto an area no larger than 3 feet square.
- To avoid obvious edges, this area should be organic in shape (not geometric).
- Vary pressure on the sponge to create subtle shifts in value, and be careful not to obscure the base coat completely, because it will make subsequent blending very difficult.
3) Feather the edges of the painted area by applying smaller amounts of glaze with diminishing pressure on the sponge as you work outward.
The feathered perimeter of the sponged area should be at least 8 inches wide.
4) Move to the adjacent area, and repeat this process to blend the new section into the existing area.
5) Small areas such as narrow bands of wall surface between windows and doors don't require feathering on the edges - if the area is 3 feet or less in width, simply work in one direction, and maintain a wet edge.
NOTE: These small areas still need to be feathered into the main body of the wall though.
Return to Sponging On Paint Techniques.
Recommended:

Recommended:


